Install and Run Hybrid Data Pipeline in Docker
Intro
When setting up Progress DataDirect Hybrid Data Pipeline (HDP), you can deploy using a standard bin file installation on Linux or take advantage of our docker container. This tutorial will walk through how to deploy Hybrid Data Pipeline using the docker container trial download.
For the most secure deployment of HDP, we recommend providing a publicly trusted SSL certificate when installing your Hybrid Data Pipeline servers. For customers looking to OData-enable a data source for Salesforce Connect, their feature to access external data within Salesforce, the use of a public SSL certificate is required.
For details on creating the PEM file needed for Hybrid Data Pipeline if you choose to use an SSL certificate, please view this tutorial: Hybrid Data Pipeline SSL Certificate Management
For this tutorial, we will assume HTTPS traffic will be terminated directly on the Hybrid Data Pipeline container. If you are using a load balancer, further documentation can be found here.
Getting Your Environment Ready
- Open the ports to your docker host depending on your architecture. These are the default ports.
- 22 SSH
- 8443 HTTPS (Web UI/OData/xDBC Clients)
- 8080 HTTP (Web UI/OData/xDBC Clients)
- Optional: 11443, 40501 for On-Premises Connector Use
- Build the SSL PEM file from your public SSL certificate if required. If you choose not to use the SSL certificate, we will generate a self-signed certificate if one is not specified in the hdpdeply.properties or docker run statement.
- The PEM file must contain the fill SSL chain of certificates, from the Private Key to the Root CA certificate.
- A tutorial on the PEM can be found here
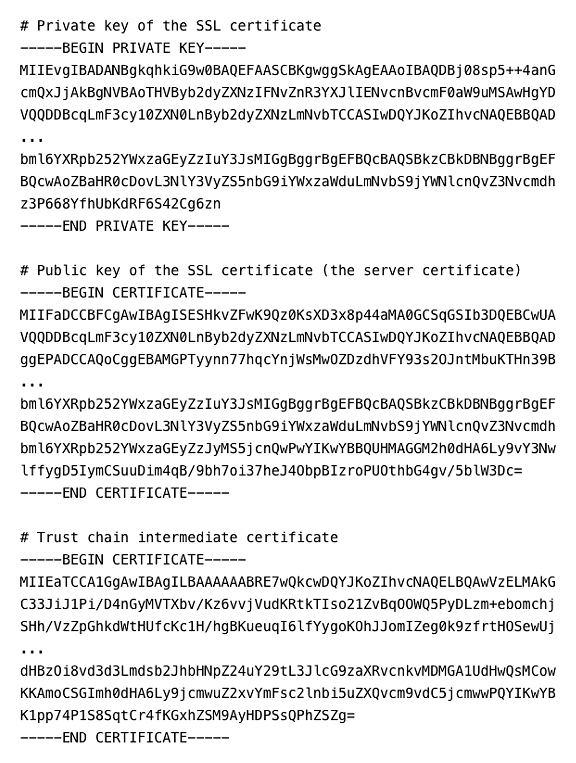
Sample PEM file:

Launching the Docker Container
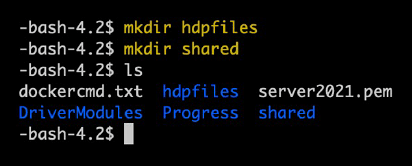
- SSH to your docker host and create two directories:
- hdpfiles – where we will place the docker image file
- shared – where the docker container will store files (persistent storage)

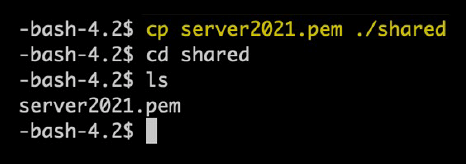
- Copy the PEM file created earlier to /shared

- Download the Hybrid Data Pipeline docker trial and copy/upload to /hdpfiles folder
and and uncompress it there.
- cd /hdpfiles
- tar xvf PROGRESS_DATADIRECT_HDP_SERVER_DOCKER.tar.gz
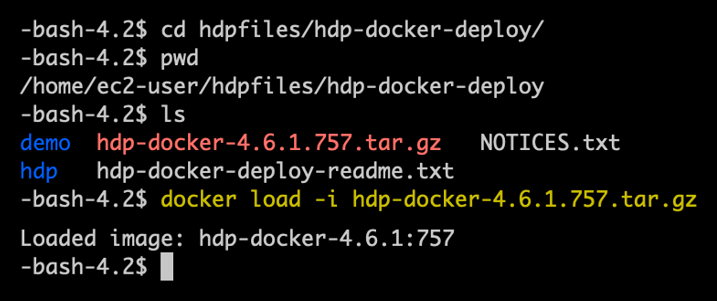
- Change into the directory where the docker image was decompressed and load into the repository. Note that the specific version numbers will change and need to match the version downloaded.
- cd /hdpfiles/hdp-docker-deploy
- docker load -i hdp-docker-4.6.1.757.tar.gz

- Confirm the image was loaded into the repository.
- docker images

- docker images
- Launch the container using Docker Run:
- docker run -dt --name my_hdp_eval1 -p 8443:8443 -p 11443:11443 -p 40501:40501 -e "HDP_EVAL=true" -e "ACCEPT_EULA=true" -e “HDP_HSQL_INTERNAL=no” –e "HDP_HOSTNAME=dockerhost.demo.datadirect.com" -e "HDP_ADMIN_PASSWORD=demo" -e "HDP_USER_PASSWORD=demo" -e "HDP_NODE_CERT_FILE=server2021.pem" -v /home/ec2-user/shared:/hdpshare hdp-docker-4.6.1:757

- Notes on the Docker Run parameters:
- - - name my_hdp_eval1
- Must be unique in your docker environment.
- -p 8443:8443 -p 11443:11443 -p 40501:40501
- Port mappings between the container and host
- 11443 and 40501 not required if On-Premises Connector won’t be used as part of HDP deployment.
- Port mappings between the container and host
- -e “HDP_HSQL_INTERNAL=no”
- Stores the configuration database in the shared storage location.
- –e "HDP_HOSTNAME=dockerhost.demo.datadirect.com"
- Hostname you will use to access Hybrid Data Pipeline. This domain name must match the SSL certificate provided in the PEM file (if you are not using a self-signed cert).
- -e "HDP_NODE_CERT_FILE=server2021.pem"
- The name of the PEM file placed inside the shared storage location.
- -v /home/ec2-user/shared:/hdpshare
- Maps the local host shared directory to the docker container’s hdpshare directory. This is where the PEM file should be placed and where the configuration database files will be stored. It is also where the hdpdeploy.properties file is placed if needed.
- - - name my_hdp_eval1
6. To access the Hybrid Data Pipeline interface, you can open a browser on your docker host or another machine with access to the container using https://<hostname >:8443, where <hostname> is the parameter defined with the HDP_HOSTNAME parameter and added to your DNS.
7. Once logged into Hybrid Data Pipeline, you can follow our documentation here to create a data source and begin using the product. For any questions, please reach to either our support team (current customers) or sales team (evaluation users).
For further details on managing Hybrid Data Pipeline, please refer to our documentation here. If you have further questions about this tutorial or Hybrid Data Pipeline in general, please contact us.