Setting up the first conversation
In the previous chapter, you used one of the preconfigured conversations, but you might be wondering how the chatbot knew what to respond with?
You will solve this puzzle by creating your first conversation.
The first conversation will allow the user to ask about the weather and the chatbot will respond with a message.
This is done in two steps:
- Add a New Conversation - with a step that will print the weather message
- Train the chatbot to recognise the New Conversation
Add New Conversation JSON
You need to add the new conversation inside the conversations: {} object. A good place to do it is after the help section and just before restart.
Add a new line just above "restart": {.
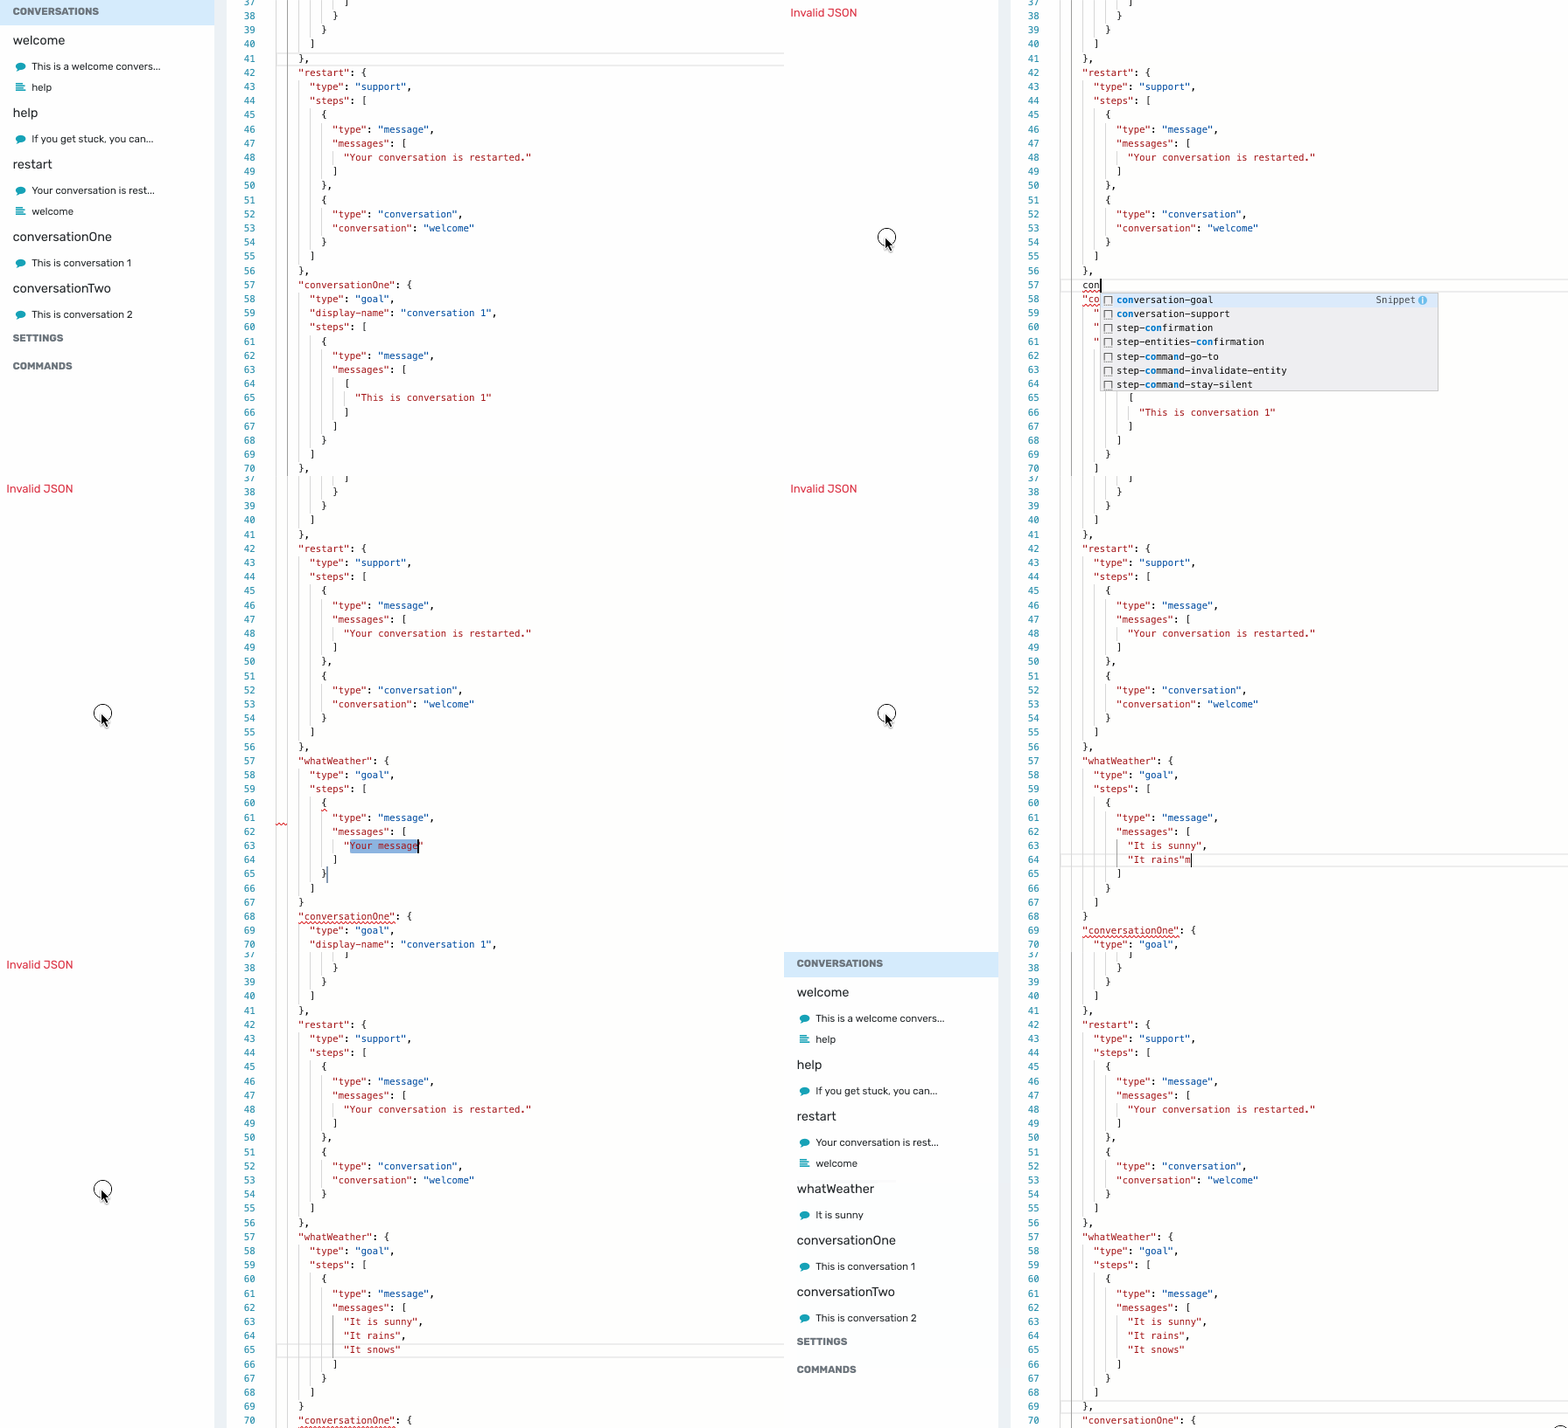
Start typing conversation, this should trigger a little pop-up with a list of code snippets.
The code snippets are really useful in the process of constructing your chatbot, as they help you generate the JSON in the correct format, plus they save you a lot of time.
Select the conversation-goal snippet and press enter. This should output the following code:
"conversation-name": {
  "type": "goal",
  "steps": [

  ]
}
Change "conversation-name" to "what-weather".
Next you need to add a message step to the conversation.
If you press tab the cursor will jump inside the steps[ ] array.
From inside the steps[ ] array, start typing step and select the step-message snippet. This should produce the following code:
{
  "type": "message",
    "messages": [
      "Your message"
  ]
}
Add a few messages to the messages[] array. For example:
{
  "type": "message",
    "messages": [
      "It is sunny",
      "It rains",
      "It snows"
    ]
}
Please note that adding multiple messages means that the chatbot can respond with one of these messages. So that if the user gets to the same step, the chatbot might respond with a slightly different text.
If you want to respond with multiple, separate, messages, just add an array of messages, like this:
"messages": [
  [
    "It is sunny",
    "Remember to wear sunglasses"
  ],
  [
    "It rains",
    "Remember to take an umbrella"
  ]
]
You may notice that the conversationOne is highlighted in red. If you hover over it, you will get an error tooltip: Expected comma. To fix it, add a comma at the end of the what-weather object.
Your new conversation object should look like this:
"what-weather": {
  "type": "goal",
  "steps": [
    {
      "type": "message",
      "messages": [
        "It is sunny",
        "It rains",
        "It snows"
      ]
    }
  ]
},
Here is how I did it:

Make sure to save your changes before proceeding.
Train the chatbot to recognise the New Conversation
Now, you need to train the chatbot to recognise the New Conversation.
This is done in the Training tab, through the built-in Conversations collection.
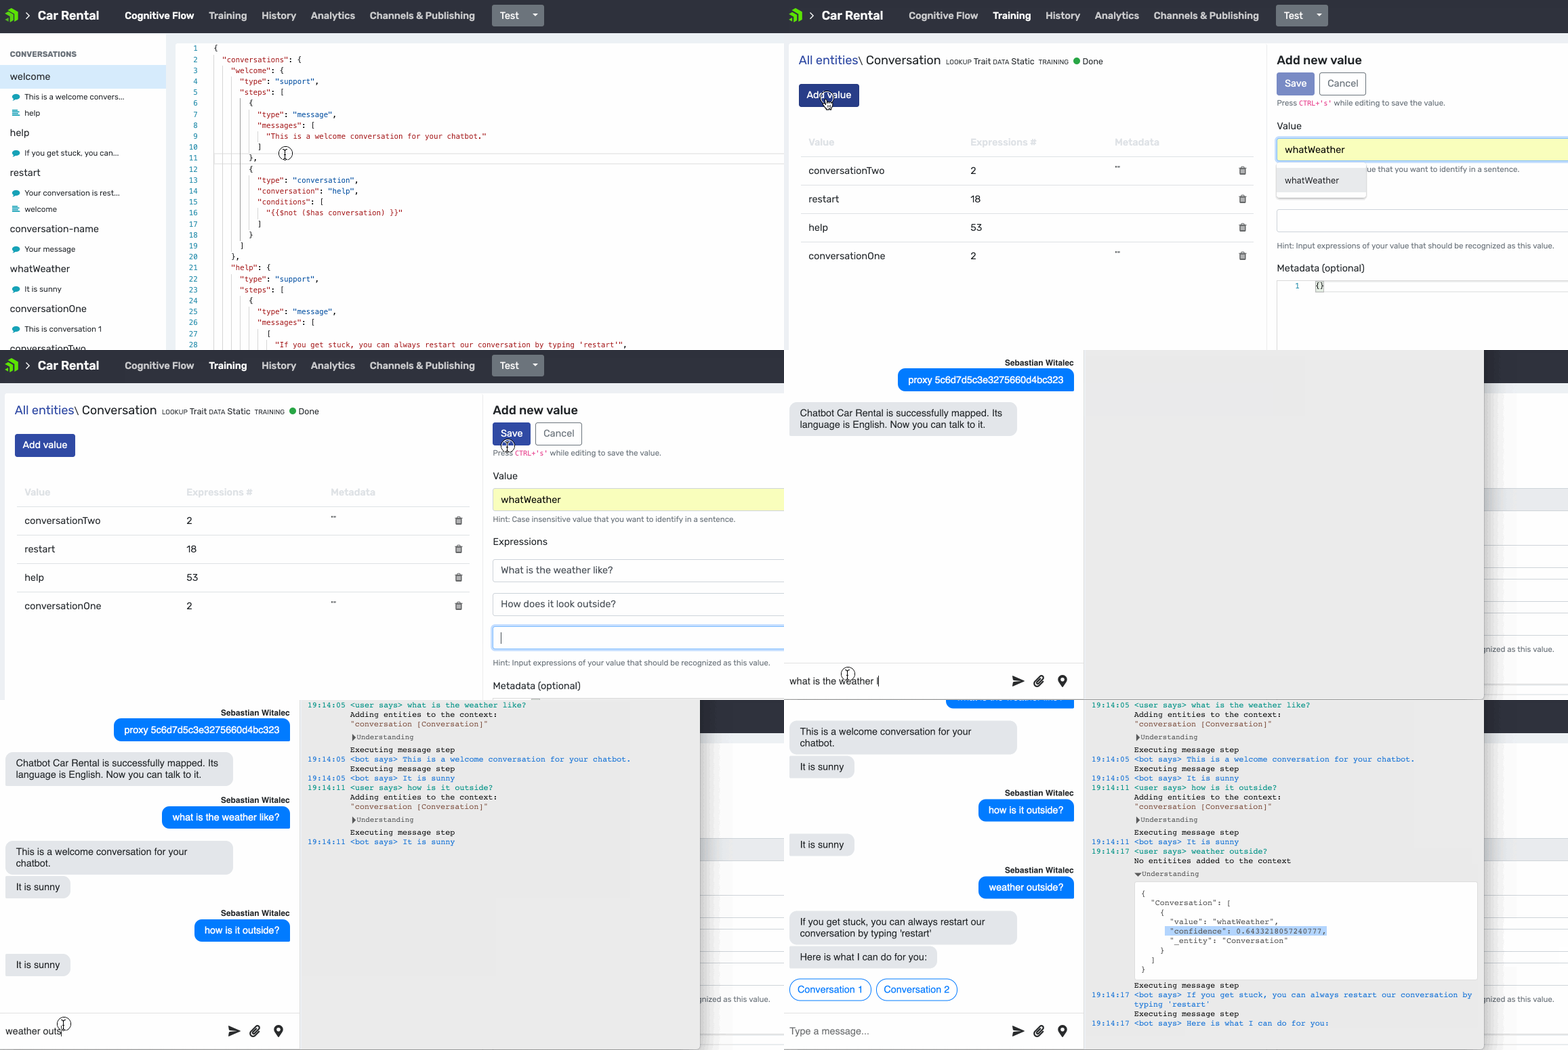
Navigate to the Training tab, open Conversation Triggers, and press Add value.
The Value is the name of the conversation JSON object. The Expressions is a list of expressions that should trigger the conversation.
Set the value to: what-weather.
Next add the following expressions, one at a time:
- What is the weather like?
- How does it look outside?
And press Save.
Updating any collection in the Training tab, automatically triggers the AI learning process. You just need to wait a little bit for the training to complete.
This is how I did it:

Test
Now you should test the new conversation.
Hot tip: If you kept the test window open, you can just type restart, and try the new logic.
Try typing anything like:
-
"What is the weather like?"
- the chatbot should respond with one of the weather messages
-
"How is it outside?"
- the chatbot should respond with one of the weather messages
Debugging
If you send a message like: "weather outside?" the chatbot will fail to identify the right conversation. This a good moment to dive into the chatbots thinking.
On the right hand side of the test window, is the chat Console, which captures everything that is going on in the conversation. Here you can see what the user typed, what the chatbot engine understood and the actions that the chatbot engine took.
Do the following to inspect what happened with the understanding of "weather outside?":
In the console, find <user says> weather outside?. Click on the Understanding item. You should see something like:
{
  "Conversation": [
    {
      "value": "what-weather",
      "confidence": 0.6433218057240777,
      "_entity": "Conversation"
    }
  ]
}
From the above info we see that, the chatbot identified the what-weather conversation with 64% confidence.
The acceptance threshold is 65%. Anything with confidence below 0.65 is deemed as low confidence and therefore ignored.
You can fix that by adding more expressions in the training. Try to focus on expressions that you expect to see more of.
Homework
Before you move on to the next part of the tutorial, here is a small homework for you. This will be used in the next part of the tutorial.
Add another conversation called rent-car. The conversation should start when the user types:
- "I want a car in"
- "I want to rent a car"
- "Do you have a car in?"
And the chatbot should respond with: "Great, let me help find a car for you."

Want to learn more about NativeChat?
Get started today